
Metamask is a popular crypto wallet app and browser extension connected to the Ethereum mainnet. It’s your gateway into the Web3 universe and the Win ecosystem. In this guide, we will show you step by step how to install the extension to your browser and how you can add Polygon to it.
Metamask does not have Polygon mainnet added by default. In order to add Polygon, you’ll have to include some blockchain information manually to Metamask. You’ll have to put in a custom RPC URL, a chain ID, and a network name. You’ll also need to import a token address to add Polygon tokens. Don’t worry! The process is not complicated, and we will be here every step of the way!
Setting up Metamask
Follow this step-by-step guide and have Metamask installed in minutes:
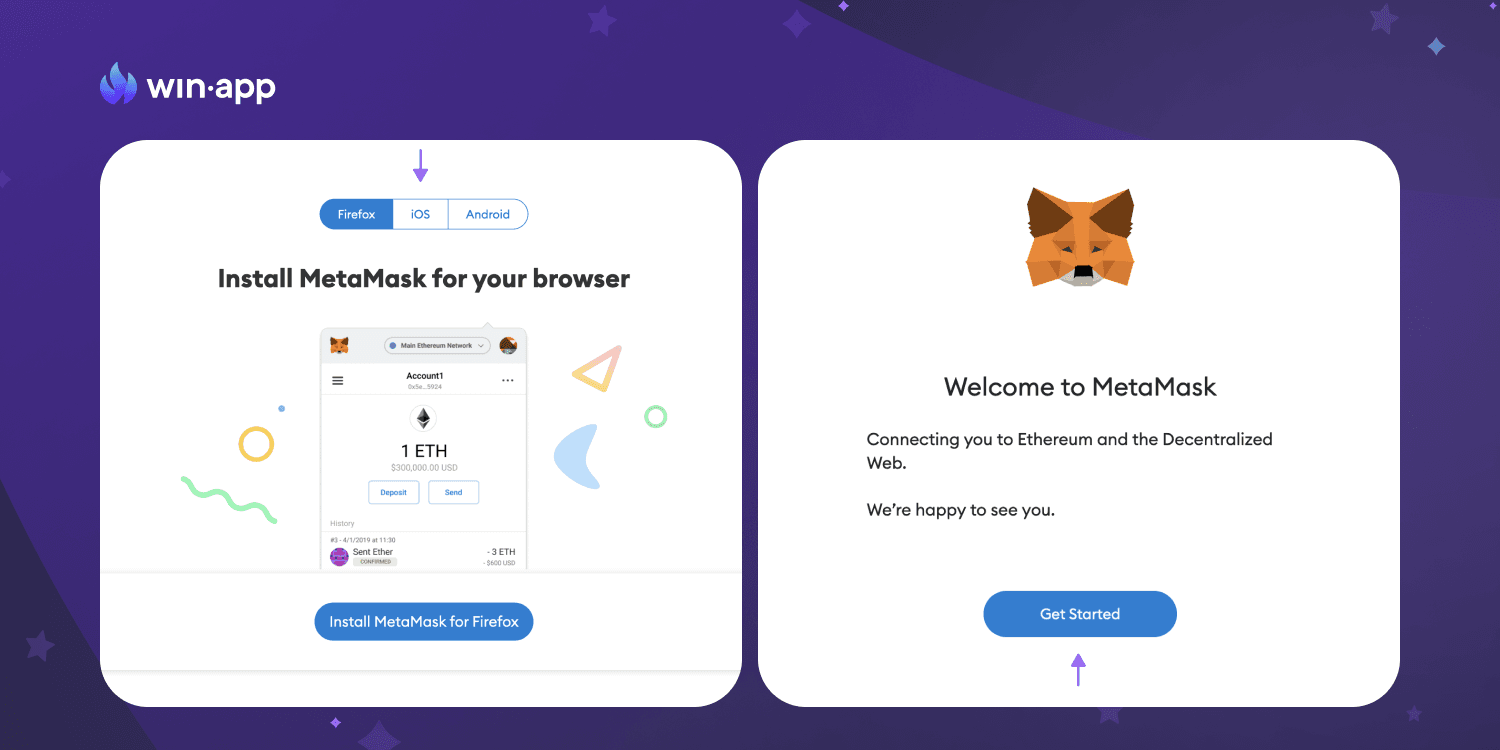
Go to the official website and choose the version that fits you best. You’ll find a desktop browser version for Chrome, Firefox, Brave, or Edge and a mobile version for iOS and Android.
After downloading and installing the extension, the following screen will invite you to < Get Started>. Click on the button.

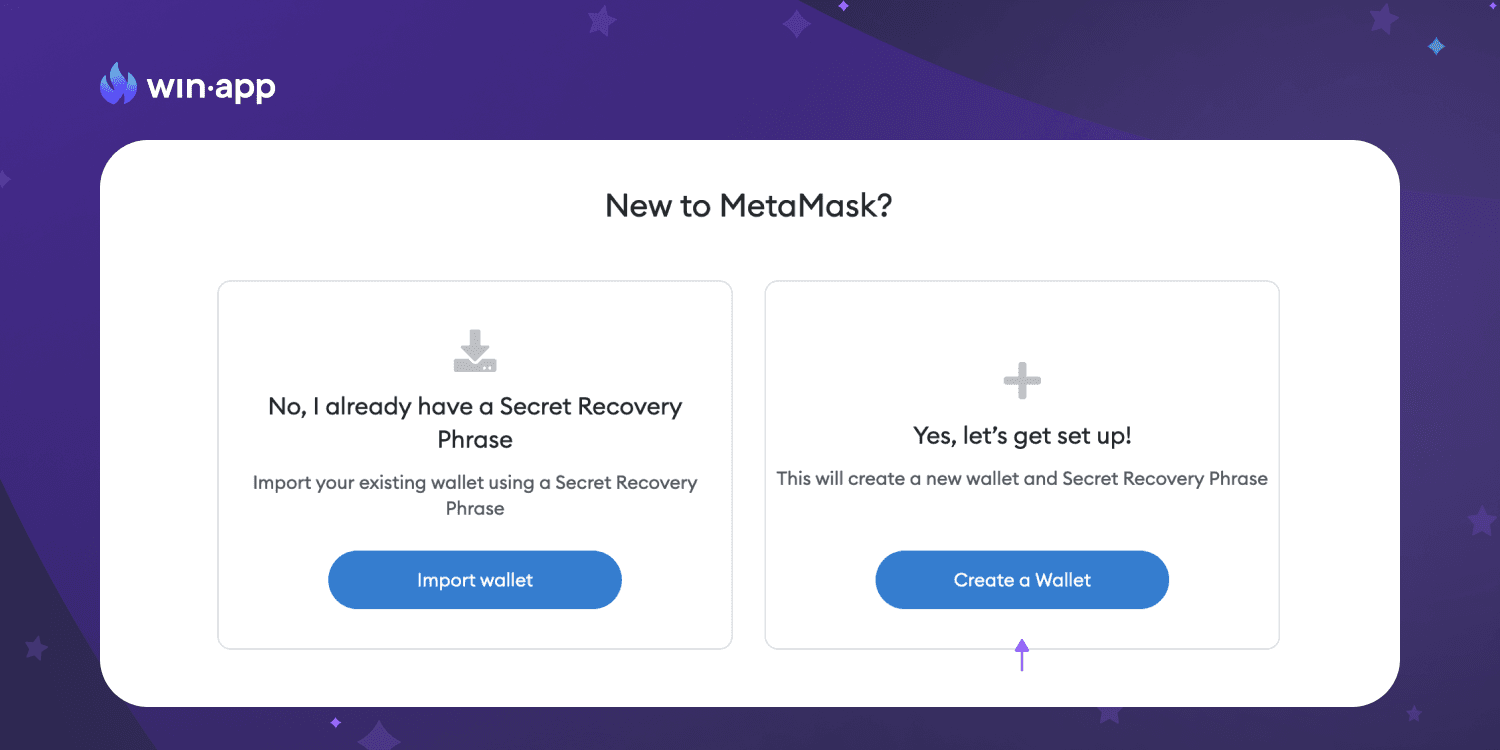
You will have two options, <Create a Wallet> or <Import Wallet>. You will need a Secret Recovery Phrase to import an existing wallet. Choose accordingly.
Metamask will ask you if you wish to share anonymous data usage to improve the extension. Your choice will not impact your usage.
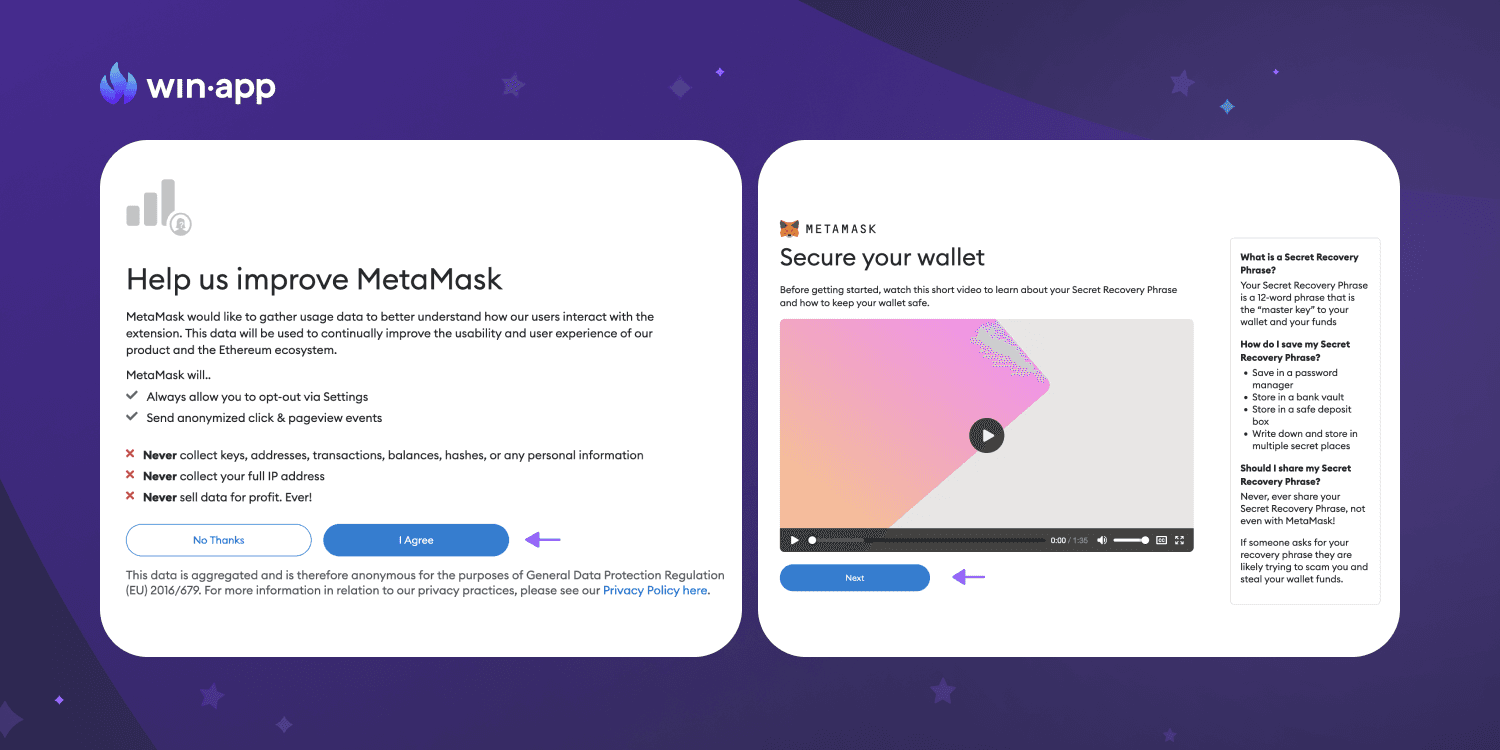
The next step is to create a password. After that, Metamask will provide you with your Secret Recovery Phrase that can be used to recover your wallet and funds if you ever forget your password.
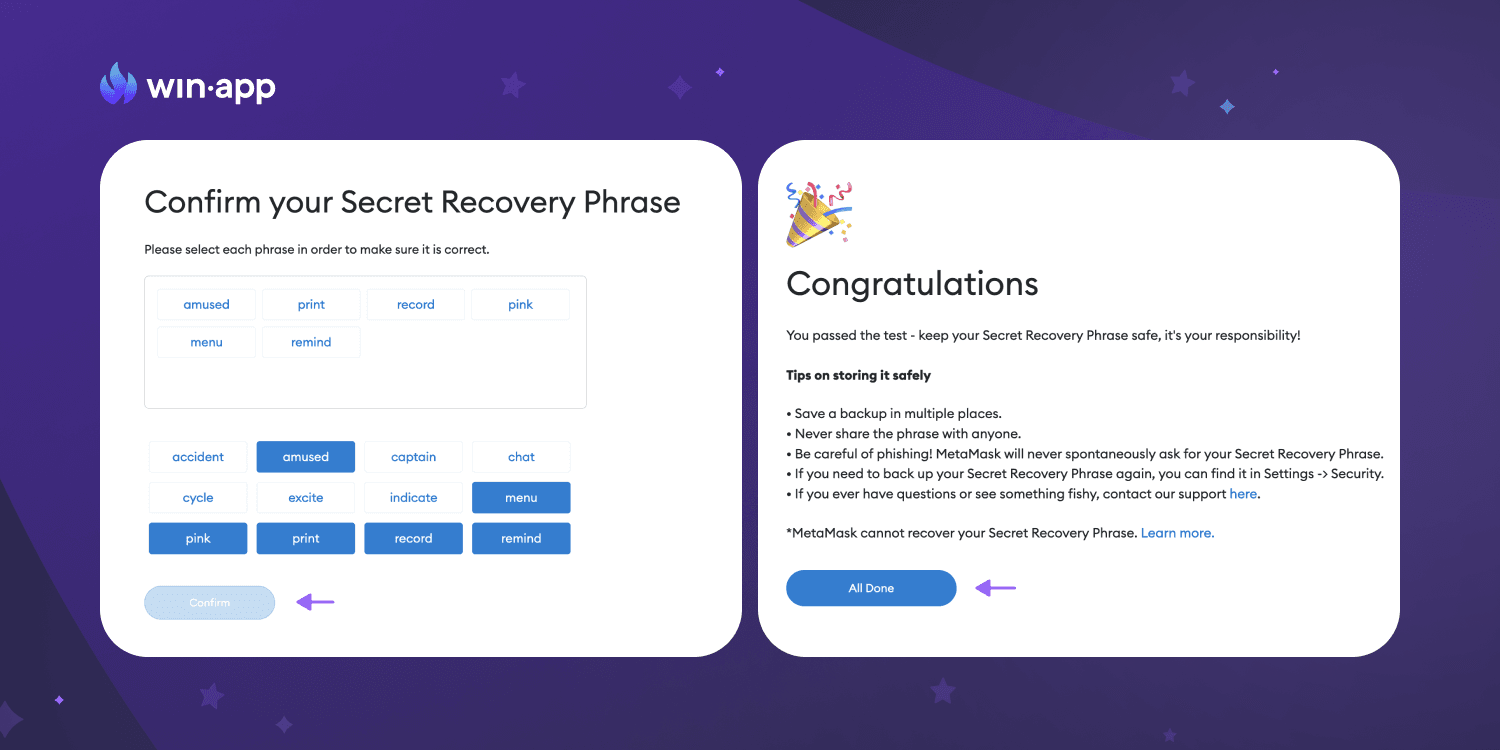
Click <Next> to see the seed phrase and confirm it by selecting the words in the correct order. Click <Confirm>.
Make sure to store your seed phrase somewhere safe, preferably offline. Never share it with anyone else.
That’s it! You’ve successfully installed your Metamask wallet. Click <All Done>.
How to add Polygon network to Metamask
As we mentioned earlier, Metamask comes by default with the setup for the Ethereum network. To connect Metamask to Polygon, you need to add some network details to the extension. This can be done either manually or automatically, and we will walk you through the correct settings.
Connect Polygon network manually
If you are on the mobile version, click on the hamburger icon at the top left, go to Settings, and then to Network. Look for the network dropdown menu on the browser version on the top right side.
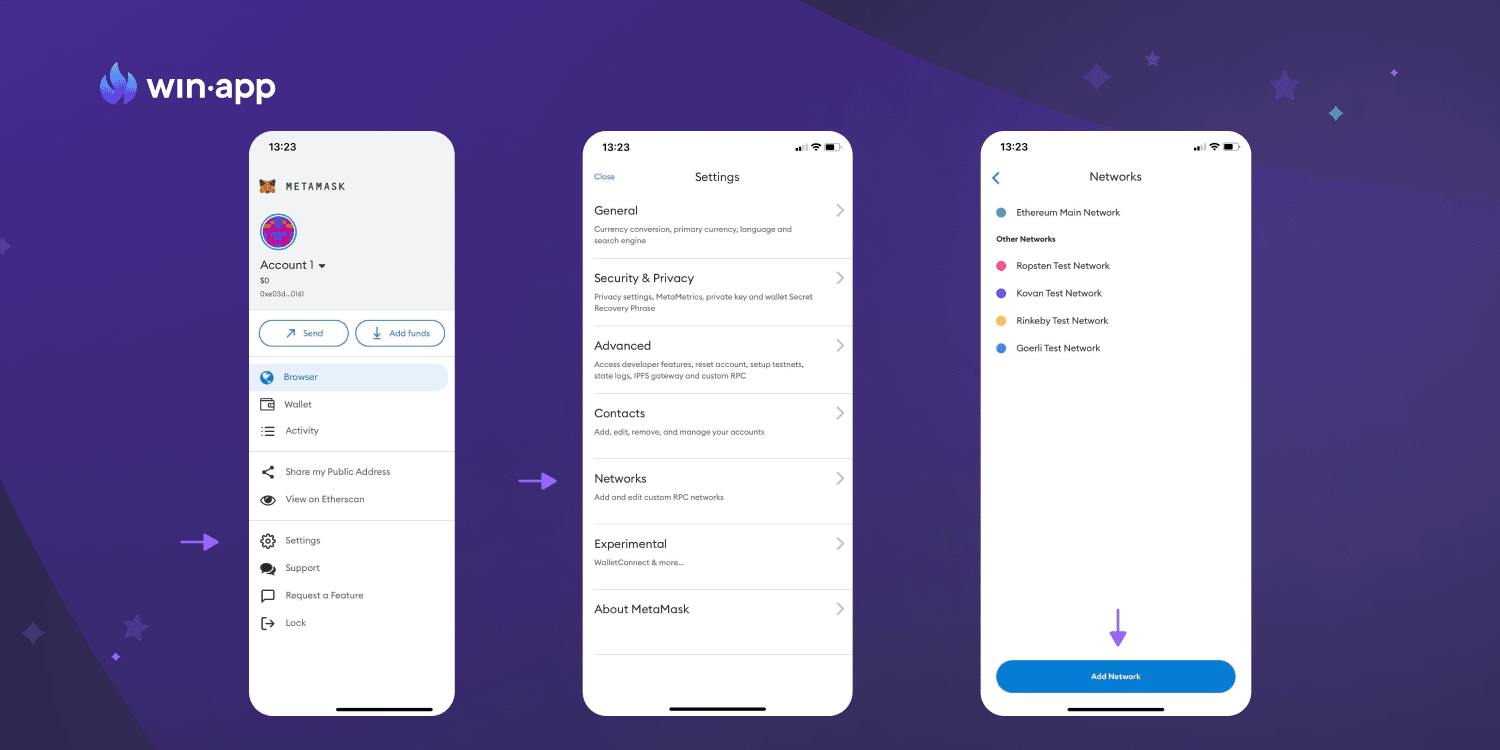
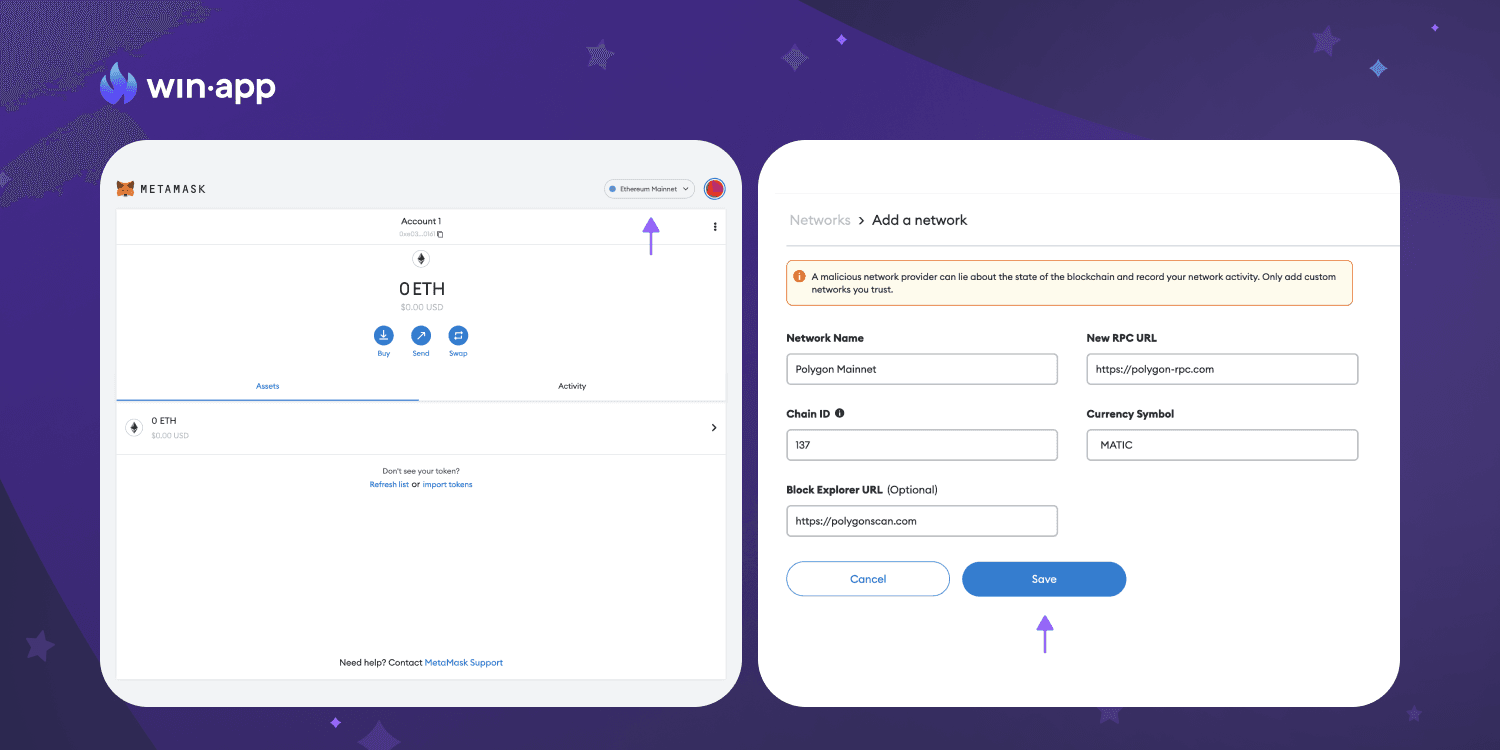
Click on the <Add Network> button and fill in the following details. Once you’re finished, click <Save>.
Network Name: Polygon Mainnet
New RPC URL: https://polygon-rpc.com
Chain ID: 137
Currency Symbol: MATIC
Block Explorer URL: https://polygonscan.com
You’re now connected to Polygon!
Add Polygon network automatically
- Go to polygonscan.com and click the < Add Polygon Network> button at the bottom of the page.
- You will receive a Metamask notification. Click <Approve>.
- From the network dropdown list, choose Polygon Mainnet. That’s all!
Adding Polygon tokens to Metamask wallet
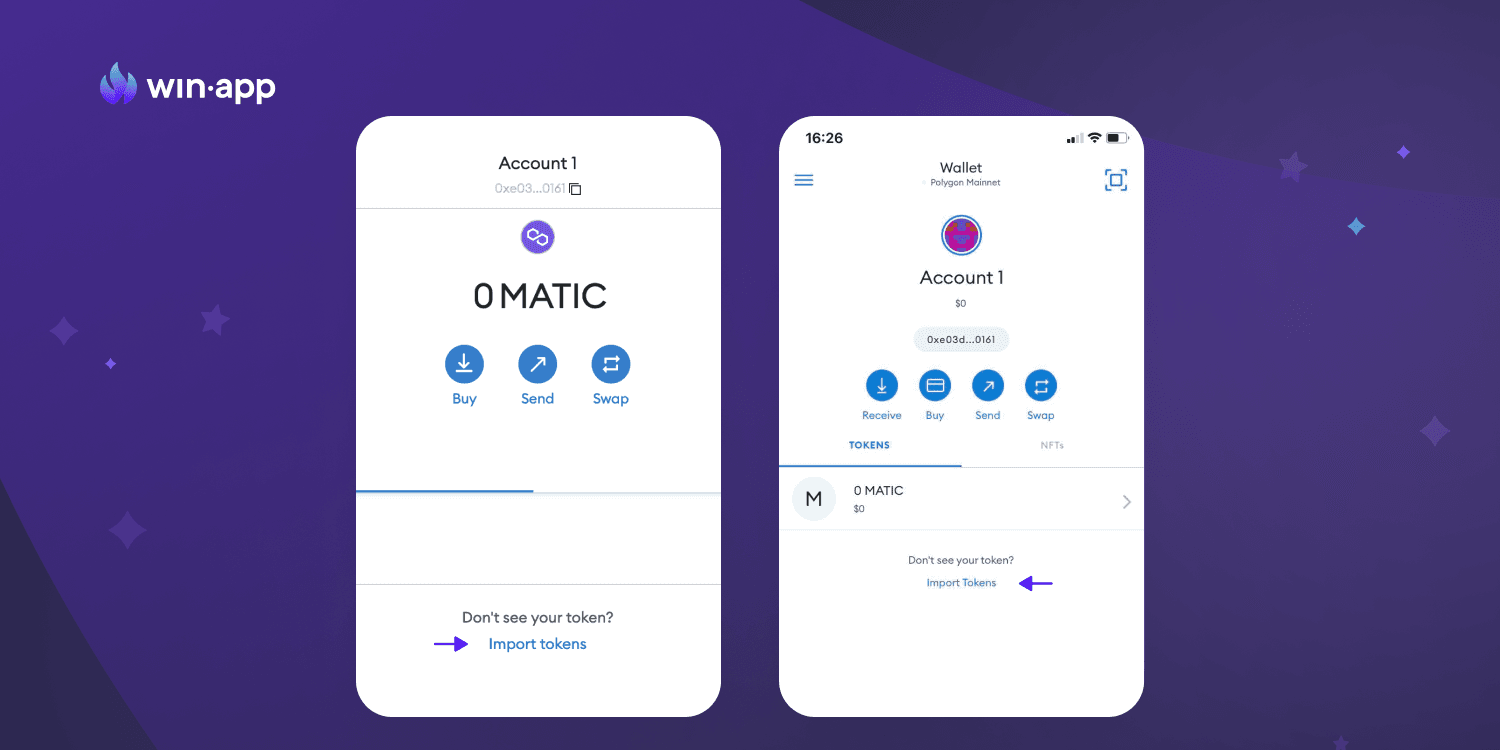
If you want to add other Polygon tokens besides the Matic tokens to your wallet UI, you will have to do it manually. Your wallet can still receive tokens that haven’t been imported yet.
- Both on the browser or mobile version, you will find the <Import Tokens> link at the bottom of the screen.
- Use the search field to locate the desired tokens and import them.
- If you’re trying to add a new token, go to Custom Token on the Import Tokens page.
- You will need to know the Token’s Contract Address. You can find it either on PolygonScan or the project’s official website. Make sure to copy the contract’s address from a reputable source.
- Once you’ve copied the contract address in Metamask, the rest of the information should automatically appear. If it doesn’t appear, you can add it manually. Click on <Add Custom Token>.
- Your wallet will now display the balance of the tokens you imported.
You’re all set to use your Metamask wallet now! Before you start managing your crypto, buying NFTs, or whatever transactions you have in mind, make sure to get some MATIC. You will need it to pay for gas fees. Stay tuned to our blog space, as we will continue to add useful guides that can help you get started in your crypto journey!
Let’s stay in touch:
🐤